


PRODUCT CATEGORY


Introduction
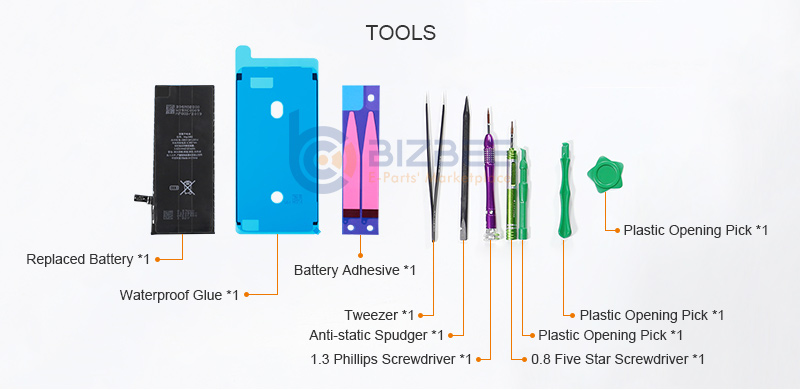
According to the feedbacks from some phone repair technicians, the easy-torn battery adhesive results in the main difficulty of replacing batteries. Once it is torn and dragged fiercely, this may result in battery distortion and even detonation. This tutorial will avoid the above situation and show you how to prevent the risk of snagging other components when pulling out the adhesive, making your assembly safely and efficiently.

I. Take apart the screen
II. Remove the fixed metal plate of the battery seat and take out
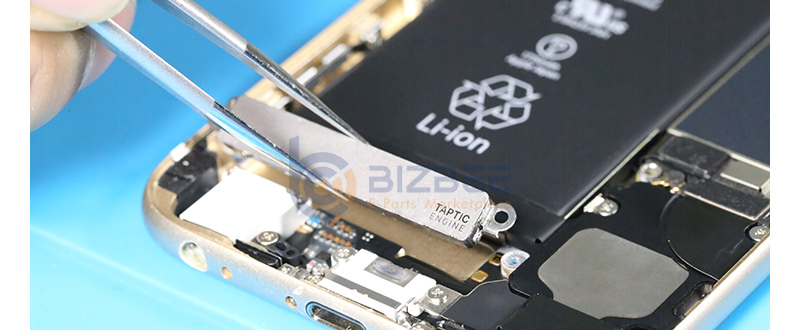
III. Disassemble the vibrator from the motherboard
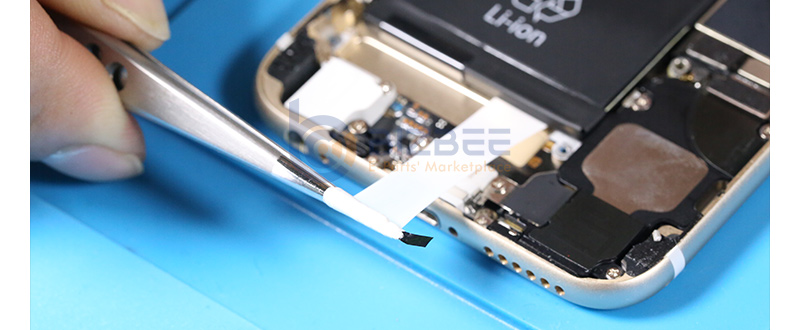
IV. Remove the battery adhesive
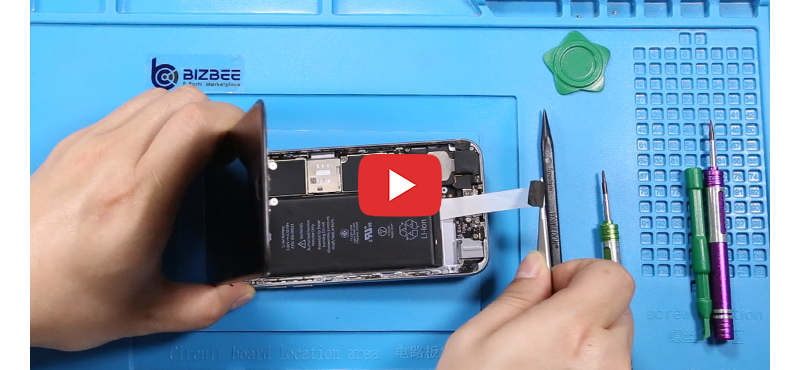
1. Roll up the adhesive with tweezers and pull it out. The distance should not be too long in case the adhesive is torn.
2. Rotate tweezers immediately when pulling out the adhesive. Repeat this step until the adhesive is completely removed.
3. The angle between the mainboard and tweezers should not be over 30°. Otherwise it may distort the battery and cause danger.
V. Remove the battery
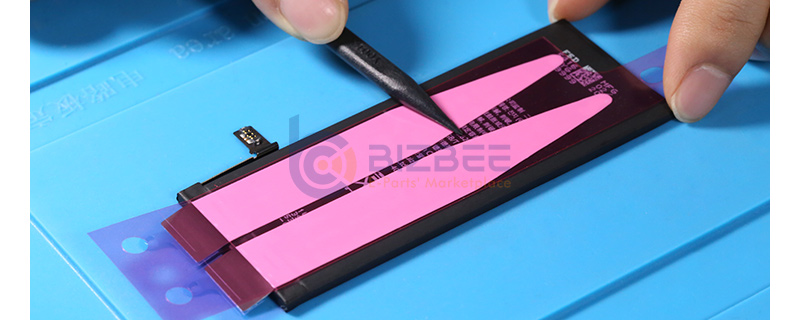
VI. Stick adhesive on the replaced battery
Note: Do not leave any bubble during the procedure. Otherwise the adhesive may be removed together when taking apart its protective film.
VII. Replace the new battery on the battery compartment then install the battery seat
VIII. Reassemble the vibrator and fasten with the metal plate
IX. Assemble the screen and test
Installation complete.
Please click the video for more detail.
How To Prevent Battery Adhesive Being Torn When Replacing Batteries


 iPhone Cases
 Samsung Phone Cases
 Xiaomi Phone Cases
 OPPO Phone Cases
 VIVO Phone Cases
 Transsion Infinity Phone Cases
 iPad Cases & Covers
 Galaxy Tab Cases & Covers
 Matepad Cases & Covers
 Mipad Cases & Covers
 Lenovo Tab Cases & Covers
 Honor Tablets Cases & Covers
 AirPods Cases
 Laptop Bags & Cases
 iPhone Screen Protectors
 Samsung Screen Protectors
 Xiaomi Screen Protectors
 OPPO Screen Protectors
 VIVO Screen Protectors
 Other Screen Protectors
 iPad Screen Protectors
 Galaxy Tab Screen Protectors
 Matepad Screen Protectors
 Mipad Screen Protectors
 Lenovo Tab Screen Protectors
 Other Tabets Screen Protectors
 Macbook Screen Protectors
 Other Laptops Screen Protectors
 Lens Protectors
 Apple Watch Bands
 Samsung Galaxy Watch Bands
 Mi Watch Bands
 Garmin Bands
 Amazfit Bands
 Fitbit Bands
 Huawei Watch Bands
 Desktop Phone Stands
 Car Phone Holders
 Phone Rings Kickstands


