


PRODUCT CATEGORY


Introduction:
With the continuous updating of smartphones, when we use smartphones, it may happen that the phone falls to the ground, causing the phone screen to break, and the screen is still relatively easy to be cracked. In this guide, we can show you how to replace your defective display unit in a right way. Follow us and check it now.
Note: True Tone functionality is disabled after a screen replacement, even when using an original Apple screen.
View Overview

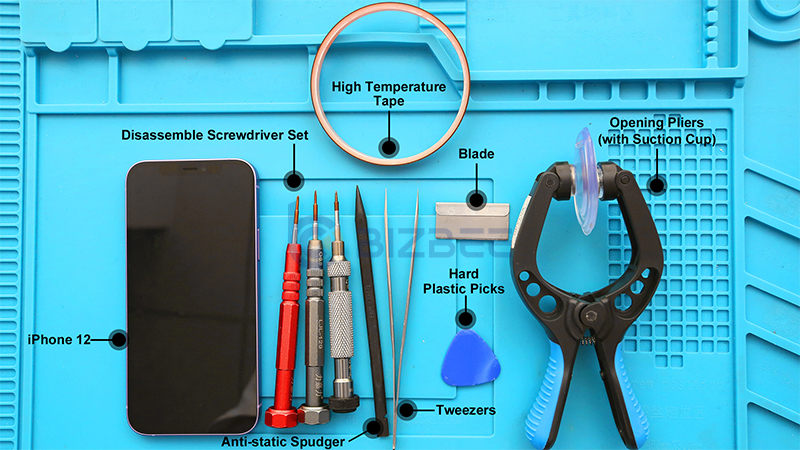
Tools:
Disassemble Screwdriver Set, Disassemble Tool Set, Opening Pliers(With Suction Cup), CPB Repair Heat Plate, Heat Gun, Hard Plastic Picks, Waterproof Glue, Anti-static Spudger, Tweezers.
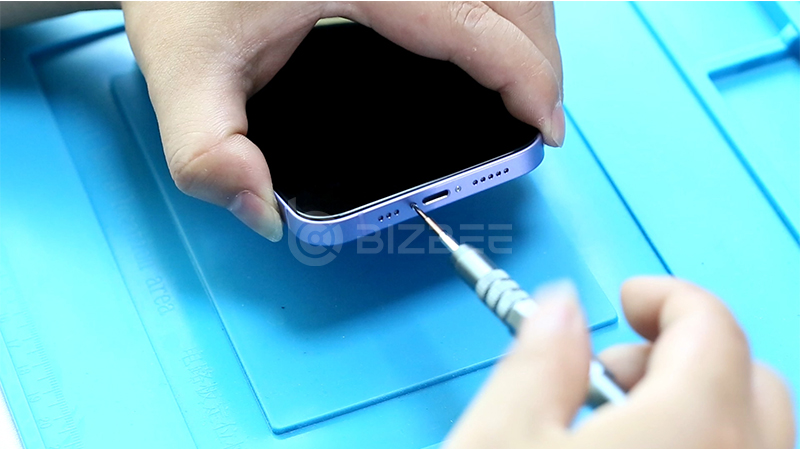
Step 1: Remove the screws
1. Remove the two 6.75 mm long pentalobe P2 screws at the bottom edge of the iPhone.
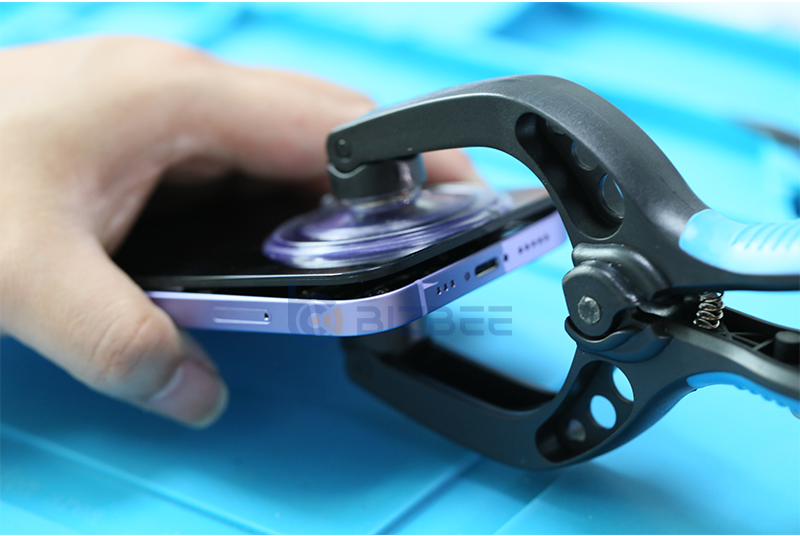
2. Put the phone on the CPB repair heat plate to heat the frame. If you don’t have the repair heat plate, a heat gun or hair dryer can be used. When the temperature reaches 70°, use the opening pliers to separate the screen from the case.
Note: It is forbidden to use iron or metal opening picks to separate them to avoid scratching the case.
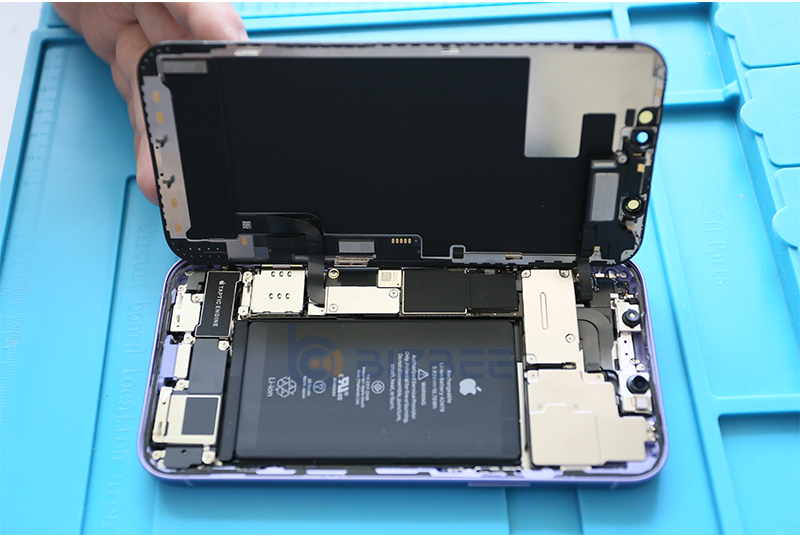
Step 2: Remove the screen
1. Open the iPhone by swinging the display up from the right side, like the front cover of a book.
2. Open the phone from the right to left. Please note that iPhone 12 has changed from the past. The flex cable is on the left side of the board (previously the product was on the right side), so as not to damage the screen cable due to operating habits.
Note: After removing the screen, pay attention to use high temperature tape to stick to the camera on the main board to prevent the dot matrix components of the camera from being contaminated with dust and being touched by hard objects to cause face ID problems.
High Temperature Tape

Unscrew the battery and display connector cover.

Unscrew the front sensor connector cover.

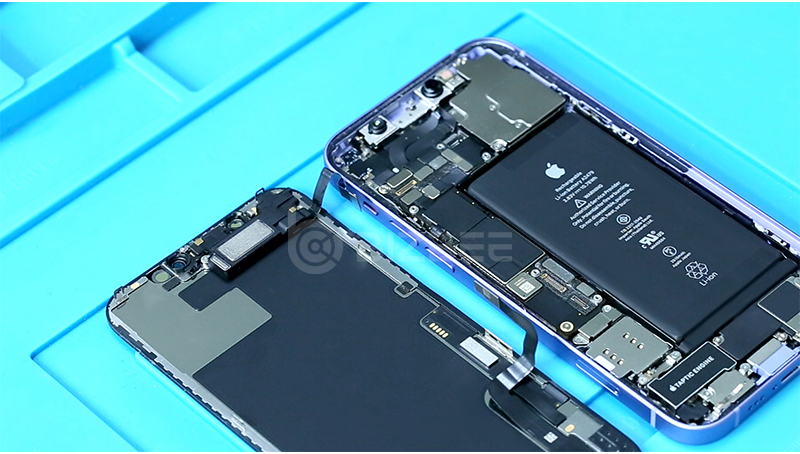
Disconnect the battery connection cable, the display cable, the digitizer cable and the front sensor assembly cable. Use a spudger to disconnect the cable connector.

After disconnect the cable connector, the mobile is completely separated from the screen.
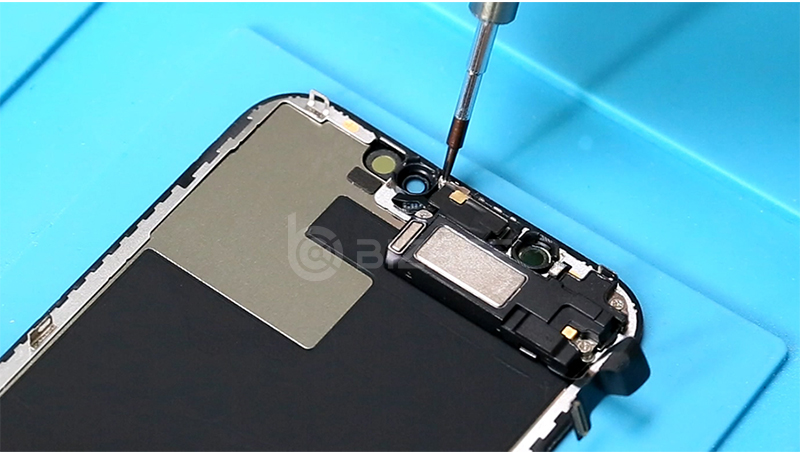
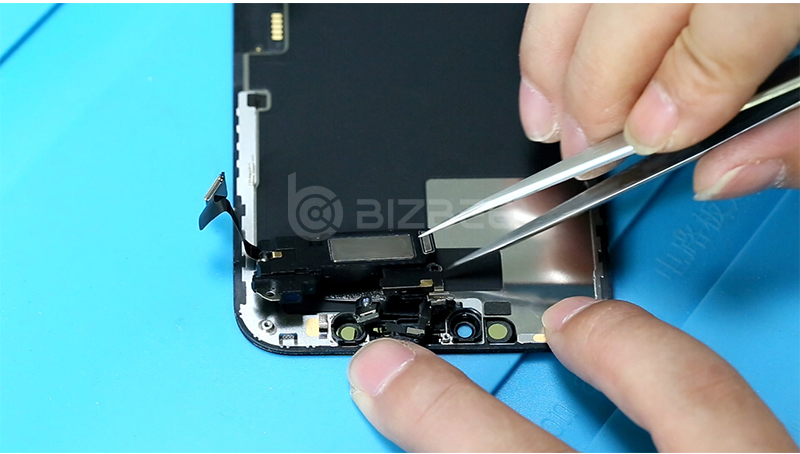
Step 3: Remove the assembly of earpiece cable
Remove all the screws on the earpiece, then place the screen flat on the heating platform, wait for 10-20 seconds, and gently remove the floodlight component and infrared component with tweezers. Be careful not to use brute force to remove it.
Step 4: Test the new screen
Connect the new screen to the main board for testing, test if the display and touch functions are OK.
Note: When testing a new screen, you need to install the earpiece cable, otherwise the main board will always be in infinite restart and cannot be turned on.
Step 5: Paste waterproof adhesive
Clean up the old adhesive remaining on the case, clean it up, and paste new waterproof adhesive on the case of the mobile phone.
Step 6: Install the earpiece cable assembly
Install the disassembled earpiece cable assembly back to the new screen. Before screwing, start your mobile for function test including display function, touch function, face ID function etc. Be sure all the function are work.
Step 7: Complete the installation
1. Install the iron connect cover on the main board. The size of the screws are different. Make sure it goes back exactly where it came from to avoid damaging your iPhone.
2. Pull the surface layer of waterproof glue.
3. Remove the high temperature tape attached to the camera.
4. Clean the board, confirm that everything is normal.
5. After the screen is installation, screw in the five-pointed screw at the bottom.
iPhone 12 screen broken is mainly divided into two reasons:
1. The outer cover glass is broken, and the display function and touch function are all normal
Solution: You only need to replace the outer cover lens without replacing the screen assembly. Use a separator to separate the cover from the display, then remove the glue on the display. Attach the new cover for vacuum processing.
2. The inner screen liquid crystal leaks and the screen does not display or displays abnormally.
Solution: You need to directly replace the entire screen.
Repair Tools and materials list in the Guide
· CPB 320 Screen Separator
· 10 in 1 Disassembling Tool with Card reader 100set/lot
For more details and latest price, please contact us:
Email: service@bizbee.com
Online-store : www.bizbee.com
Signup and Get Your Dedicated Account Manager


 iPhone Cases
 Samsung Phone Cases
 Xiaomi Phone Cases
 OPPO Phone Cases
 VIVO Phone Cases
 Transsion Infinity Phone Cases
 iPad Cases & Covers
 Galaxy Tab Cases & Covers
 Matepad Cases & Covers
 Mipad Cases & Covers
 Lenovo Tab Cases & Covers
 Honor Tablets Cases & Covers
 AirPods Cases
 Laptop Bags & Cases
 iPhone Screen Protectors
 Samsung Screen Protectors
 Xiaomi Screen Protectors
 OPPO Screen Protectors
 VIVO Screen Protectors
 Other Screen Protectors
 iPad Screen Protectors
 Galaxy Tab Screen Protectors
 Matepad Screen Protectors
 Mipad Screen Protectors
 Lenovo Tab Screen Protectors
 Other Tabets Screen Protectors
 Macbook Screen Protectors
 Other Laptops Screen Protectors
 Lens Protectors
 Apple Watch Bands
 Samsung Galaxy Watch Bands
 Mi Watch Bands
 Garmin Bands
 Amazfit Bands
 Fitbit Bands
 Huawei Watch Bands
 Desktop Phone Stands
 Car Phone Holders
 Phone Rings Kickstands


