

Nowadays, there are many machines without FACE ID in the market, especially if the phone cannot be unlocked after being dropped, the input interface will prompt to move higher and lower.
It is inconvenient for the user to unlock, because the face component is bound to the CPU, and it can only be repaired after the damage, but the price is high. Recently, the repair market has made breakthroughs in FACE ID repair technology.
Let's take a look at the following maintenance process of how to fix Face ID "Move Higher or Lower" problem.
First of all, to repair the face ID, make sure that the face ID assembly is the original , and it cannot be repaired after replacement. Use the following methods to maintain a high success rate.
As shown below
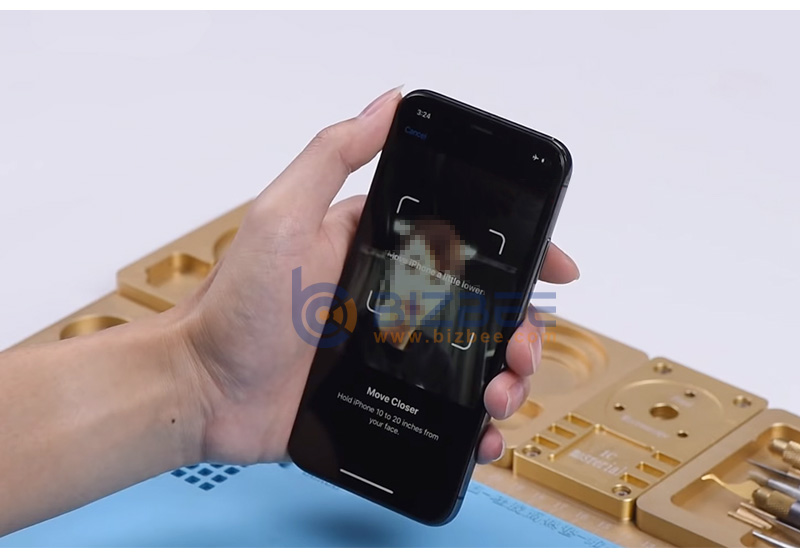
Symptom of failure:
The iPhone prompts "Move iPhone higher" or "Move iPhone lower" when entering Face ID (see picture above)
The cause of the failure:
The main reason for this failure is that the dot matrix projector (see below) is damaged or damaged elsewhere.
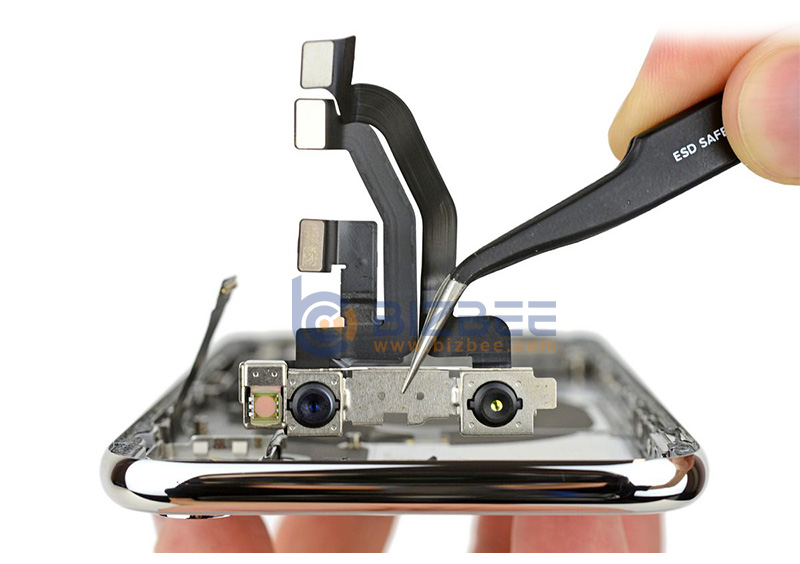
Solution principle:
Taking advantage of the feature that the chips in the dot matrix projector can only be read but cannot be written, JC has developed an original plug-in readable and writable chip (see below) or the dot matrix chip of the Lupin tool, adding the dot matrix array Line.
After reading the original dot matrix identification code, write it into the original external readable and writable chip or the dot matrix chip of the LuBan tool, so that the iPhone will recognize the restored dot matrix as the original dot matrix.
There are JC dot matrix repair solutions, i2C dot matrix repair solutions and Luban spot matrix repair solutions on the market. Among them, the JC dot matrix repair solution is similar to the i2C dot matrix repair solution. Below we will compare the i2C dot matrix repair solution and the LuBan spot matrix repair solution.
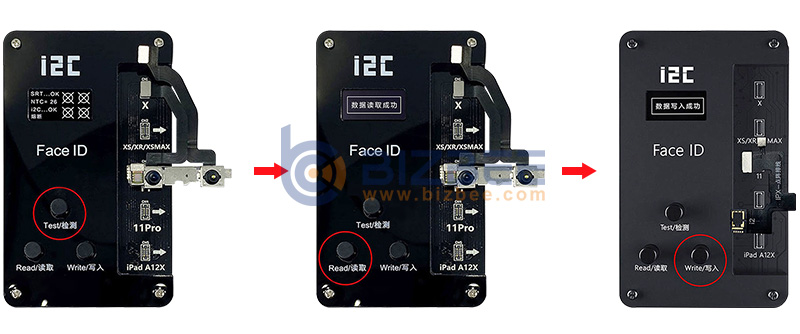
1. Connect the dot matrix cable of the corresponding model.
2. Press the read button (do not power off, otherwise the data will be lost).
3. Buckle the I2C dot matrix cable into the host, press the write button, and wait for it after the write is successful (do not power off, otherwise the data will be lost).
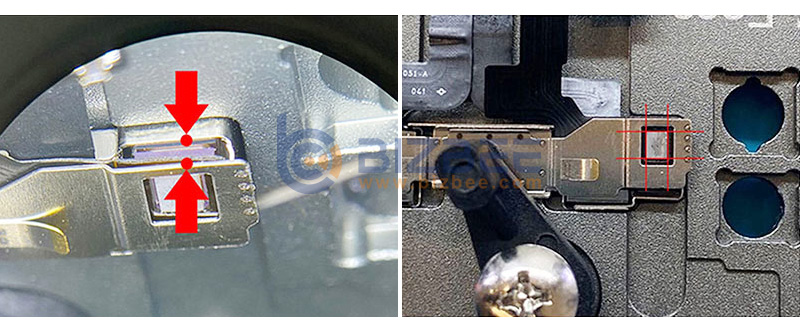
4. Use a polishing tool to cut the roll cage of the dot-matrix projector. Do not open a large gap after cutting. The entire operation does not need to remove the optical part of the dot-matrix projector to prevent the displacement of the dot-matrix projector and the input of face recognition. Produce flicker and jitter, you can also use UV glue before and after cutting the roll cage.
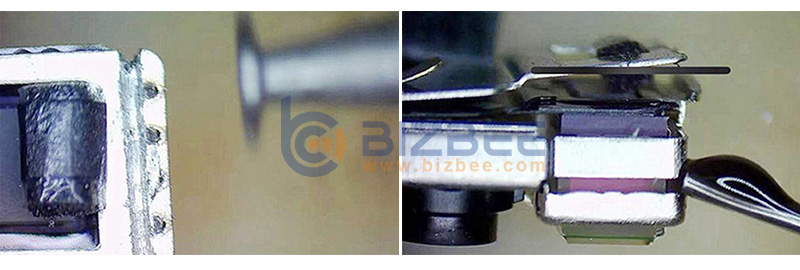
5. Use a pry knife or scalpel to separate from this position, pay attention to the temperature of the air gun.
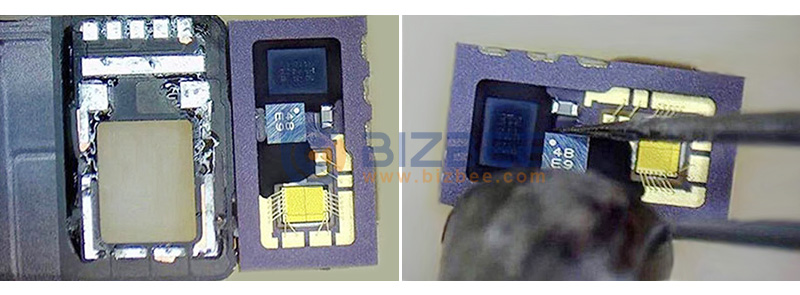
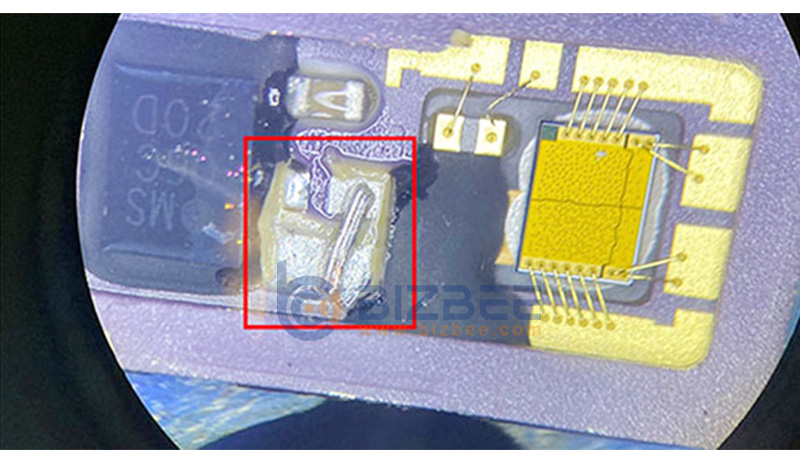
6. After separation, remove the 4BE9 mos tube on the dot matrix board and short-circuit it as shown below.
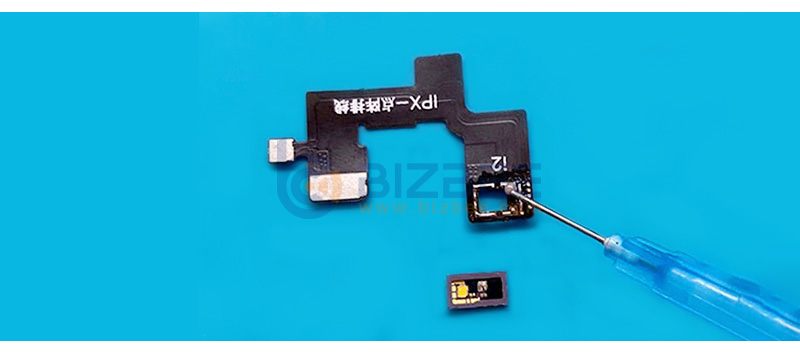
7. Solder the small dot matrix to the cable attached to the I2C dot matrix repairer.
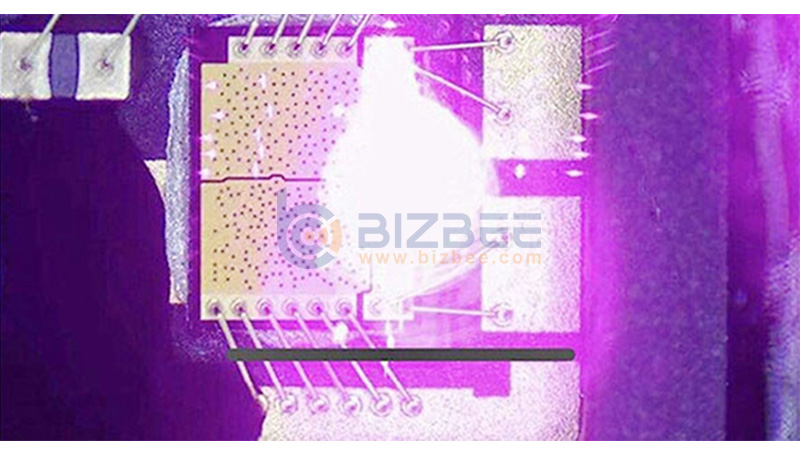
8. Test after welding, you can observe in the camera state of Samsung mobile phone or microscope, the red light flashing state means normal.
9. Replace the original cable, align the position with the optical part of the dot matrix projector according to the original position, fix it with a small amount of glue, and solder the three originally separated pins after fixing.
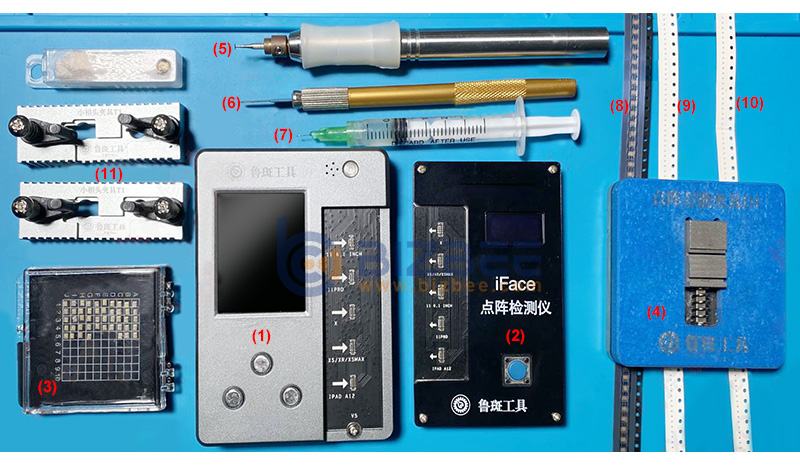
Tool:
(1)LuBan dot matrix repairer(sku: A25519)
(2)Face ID dot matrix test tool
(3)Dot matrix chip(sku: A25659)
(4)Dot matrix fixture
(5)Polish pen
(6)Pry
(7)Glue
(8)Dot matrix chip adapter
(9)Inductance
(10)Capacitance
(11)Dot matrix module fixing fixture
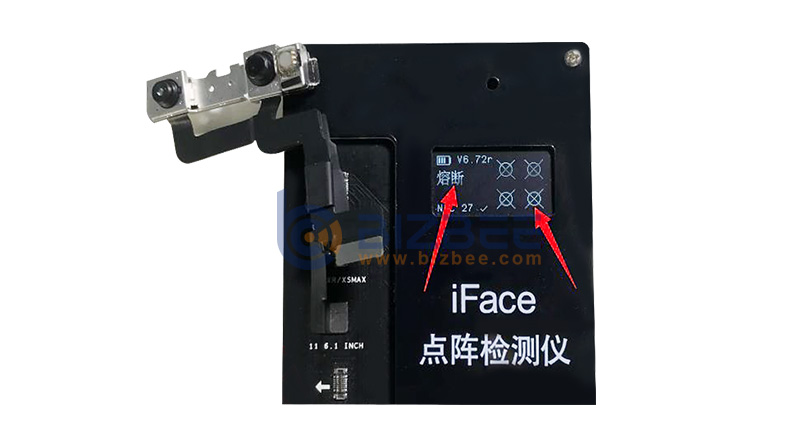
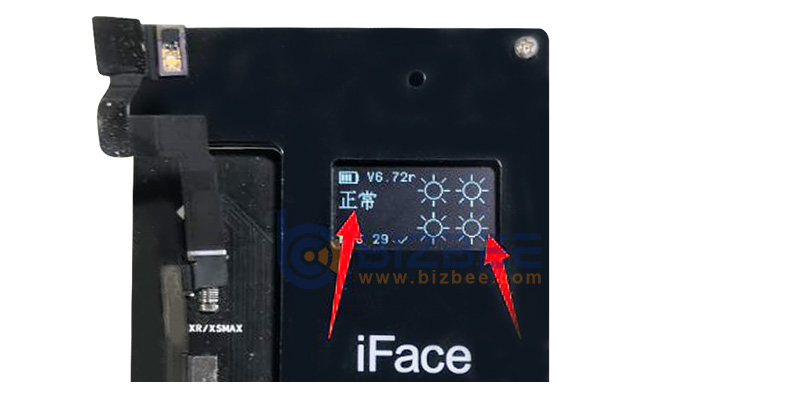
1. First take out the dot matrix. Use the test tool to determine whether it is faulty. The display fuse means that the dot matrix is damaged.
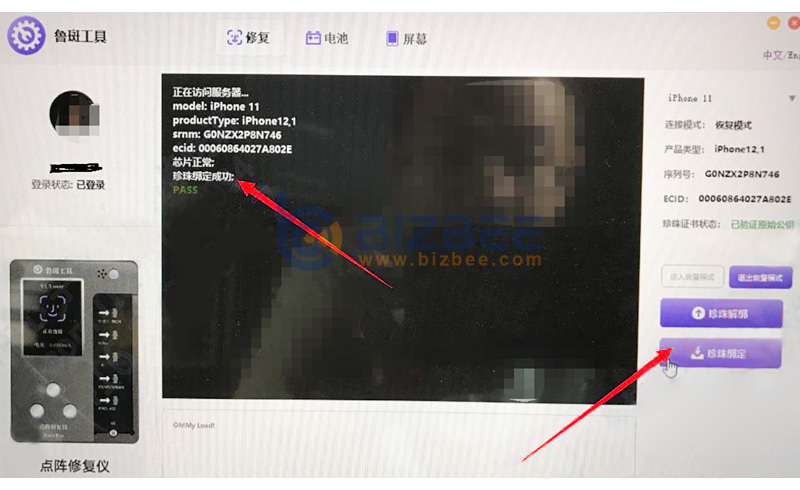
2. Make sure that the dot matrix is completely damaged. Let's replace the dot matrix chip below. Before replacement, connect the computer to unbind the information.
The dot matrix line is buckled on the Luban dot matrix repair tool, and then the phone is connected to the computer.
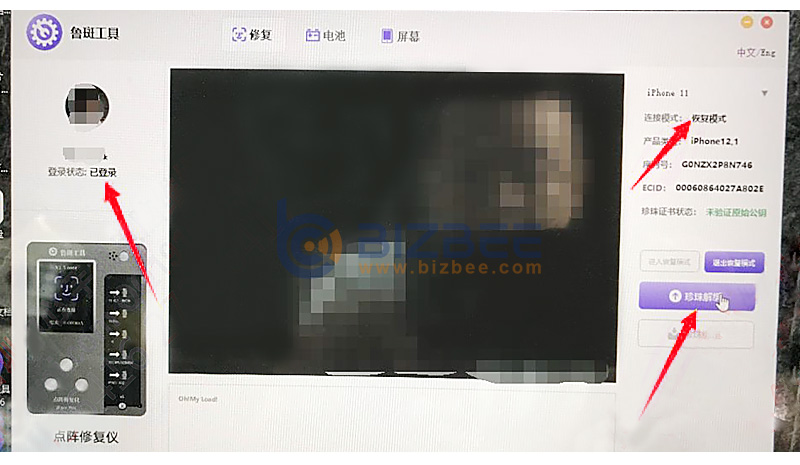
3. After the unbinding is successful, let’s remove the dot matrix. The disassembly method for different models is roughly the same. We use a grinder to grind along the frame, and do not cut the dot matrix glass.
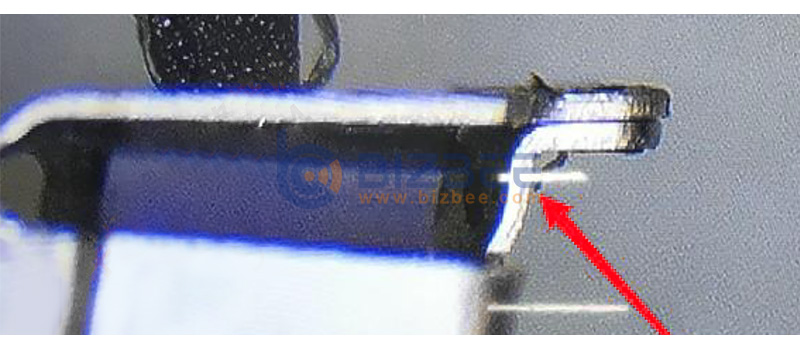
4. After cutting, we use an air gun to heat it at 300 degrees and pry open the lattice glass. Before prying, it is best to observe the corresponding upper and lower positions to facilitate alignment during installation. The blade is stuck at the junction of the glass and the base.
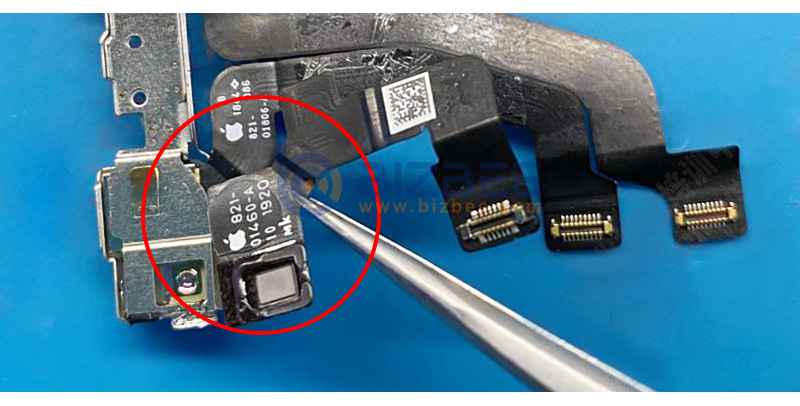
5. After removing, the dot matrix glass should be kept clean and free of dust. It is recommended to blow it off with a clean blower, do not wipe it with anything.
Now it's time to replace the chip. We fix the dot matrix cable, the glue on the outside of the frame cannot be removed, and it is easy to be misaligned when installed and aligned after removal. When removing the chip, be careful not to damage the yellow dot-matrix illuminator, and prevent foreign matter from entering the soldering oil.
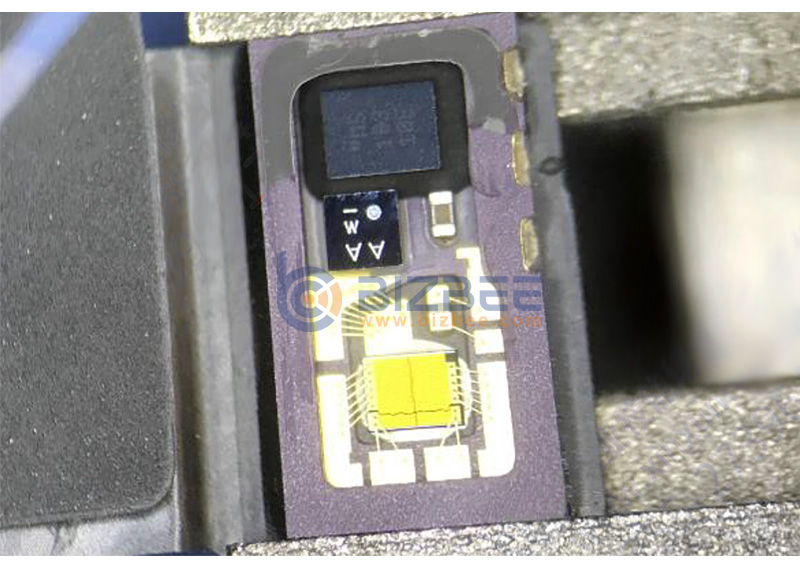
6. After removal, we first tin the pads and then solder the transfer pads, because the original chip are 12 points, and the chip we want to replace are 20 points. Don't get the wrong direction of the adapter plate, and bend the line position.
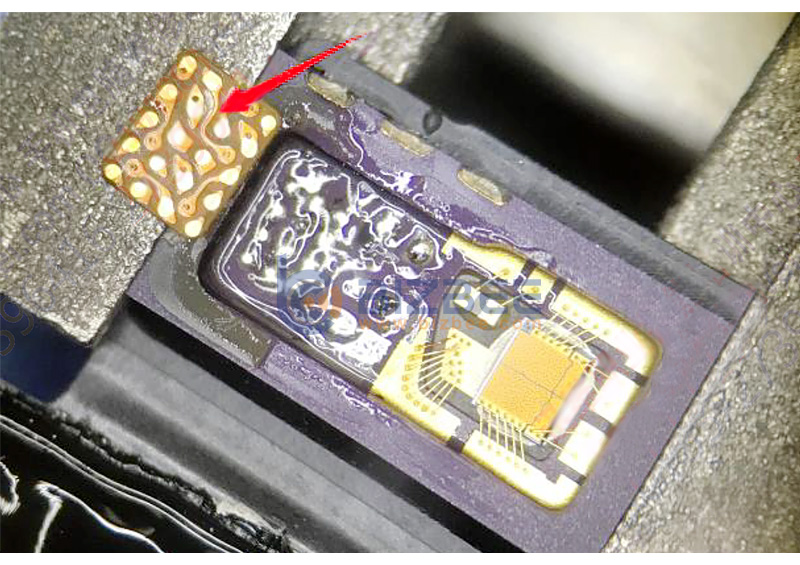
7. After the adapter is soldered, we solder the chip. (Need to be used with LuBan dot matrix repairer) Now the tin on the adapter is convenient for soldering. After processing the chip pads, the solder joints become smaller, otherwise the soldered chips are too high and easy to withstand.
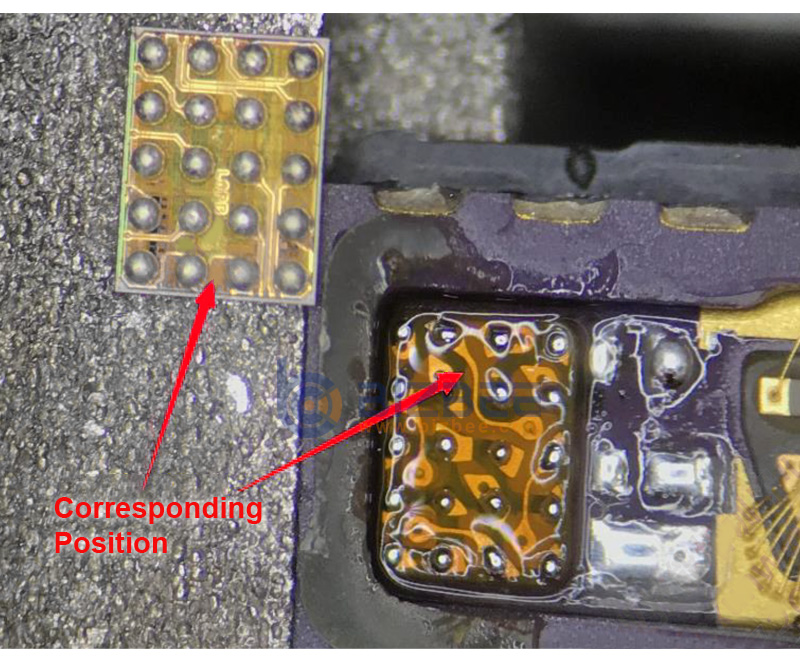
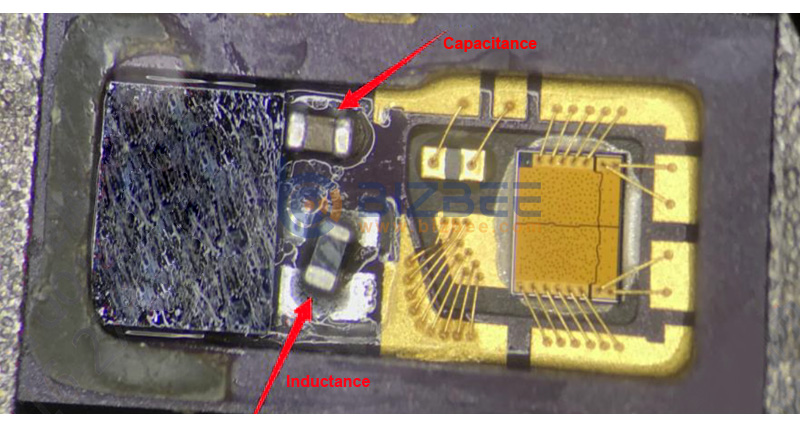
8. After the chip is soldered, install the capacitor inductor, black inductor, and yellow capacitor.
9. Use the unbinding tool to bind the chip.
10. After the binding is successful, we use the dot matrix test tool to test whether the dot matrix is normal.
11. After the dot matrix test is successful, first clean the soldering oil, and then check the light emitter and the dot matrix glass for impurities. We install after no problem.
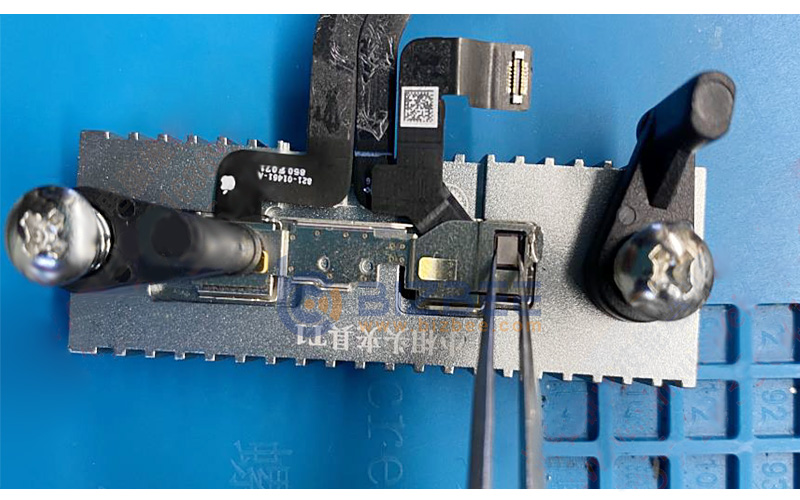
12. Use tweezers to adjust the angle properly, because the original machine is glued, so it is very convenient to align the position. After the position is correct, press it with a clamp, and then glue. The glue is special glue for dot matrix. Glue only needs to be injected on the upper and lower sides. After the glue is injected, take it to the preheating table for heating and solidification. The preheating table is opened and heated at 120 degrees for about 10 minutes.
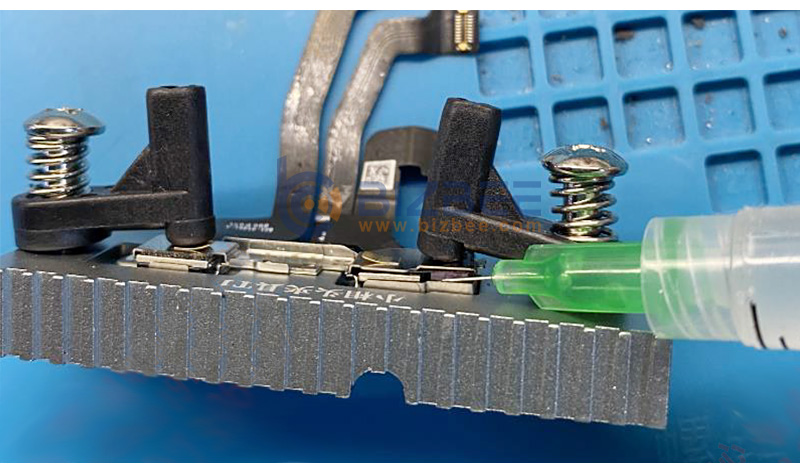
13. Finally, put it in the phone then test.
The operation method of the dot matrix detection module and the JC host PRO1000S is the same as the I2C operation method. We will not demonstrate it.JC PR01000S does not need to disassemble and reassemble the encryption chip, just replace the dot matrix cable to repair the iPhone Face ID dot matrix problem, and can save the dot matrix data to avoid the loss of the dot matrix data when the phone is damaged again and cannot be repaired.
The good news is that the JC V1S can also be used to repair the dot matrix projector with the dot matrix extension board, and the JC V1S customers only need to upgrade the JC-V1S and directly purchase the dot matrix extension board,and dot matrix cable or chip.


